


Introduction
Cervical screening programmes have existed in many counties since the late 1980s. They have dramatically reduced the incidence of cervical cancer. In the mid 2000’s, the advent of vaccines against HPV – the main causes of cervical cancer have further reduced the incidence of the disease. However, screening programmes still remain an important part of cervical cancer prevention. Not all teenagers are vaccinated, and the vaccine is not 100% effective. There are also instance where patients may contract HPV before the HPV vaccine is given.
Traditionally cervical screening involves the use of a smear test. In this test, a brush is used to collect cells from the cervix, and these cells are then examined under the microscope for changes associated with cervical cancer. It is recommended that women undergo a smear test every 2-3 years (depending on country).
In the late 2010’s a new type of cervical screening became available – known as the “Co-test”. In this test, a similar technique is used, however the sample is first checked for evidence of HPV DNA, using a PCR technique. If no HPV DNA is detected the test is considered negative – and patients do not need a repeat test for another 5 years. If HPV DNA is detected, then the sample is also examined for the presence of cancerous cells – using cytology. Depending on the results of this cytology, then the test may be repeated in 1 year, or various other management may be required (such as referral to gynaecology for colonoscopy).
In the article, we will discuss the new “Co-test” from the perspective of the Australian Screening programme (which was the first to implement the new test). For historical context, the original “Pap smear” (or sometimes just “smear”) test is also discussed.
The Co-Test
Australia has one of the lowest incidences of cervical cancer in the world, thanks to the success of the cervical screening programme.
In December 2017, the screening programme underwent largescale change with several benefits – including:
- Earlier detection of at risk patients
- Reduced frequency of testing for the majority of the population
- A self-collection option will be available for women over 30
Cervical Cancer
- Most cases causes by oncogenic types of HPV
- HPV infection of the anal and genital regions is common in both men and women and is transmitted by direct skin to skin contact. It does not necessarily require penetrative sex, and can be transmitted by oral or anal sex as well as skin to skin contact of anogenital areas
- Most HPV infections are transient and are cleared within 1-2 years
- Infection persists in up to 10% of women
- In these cases, HPV infection can cause pre-cancerous changes of the cervix – often referred to as squamous intraepithelial lesions (SIL)
- If these early abnormalities are not detected and treated, then cervical cancer can develop – but usually takes about 10-15 years
- HPV
- Over 100 types
- 40 are associated with anogenital infection
- 14 of these 40 types are oncogenic
- Types 16 and 18 are most strongly associated with cervical cancer
- Types 16 and 18 are also strongly associated with anal cancer. Anal cancer is particularly common in men who have sex with men
- Other cancers are also associated with HPV (and in particular with types 16 and 18), including vulval, vaginal, penis and oropharyngeal cancers
- Types 6 and 11 cause most cases of genital warts
- Other risk factors for HPV:
- Lack of regular cervical screening – as many as 50% of cases of cervical cancer are associated with women who have never been screened, and a further 30% in women who are under screened
- Diethlystilbosterol (DES) exposure in utero. DES is a form of synthetic oestrogen that was prescribed to pregnant women between 1940 and 1971 to prevent miscarriage, premature labour and complications of pregnancy
- Smoking
- Oral contraceptive use for more than 5 years. The risk declines when use is stopped, and returns to baseline at 10 years after useage ceases
- Age – most commonly seen in women over 35
- Early age at first pregnancy
- A large number of full term pregnancies – risk increases with number of pregnancies
- Immune deficiency
HPV to cervical cancer
- Not a linear process
- Some HPV infections cleared quickly
- “Clearing” of HPV infection is controversial. The term “clearing” refers to the lack of ability to detect HPV in testing. It is not clear whether the infection is completely cured, or the HPV virus just enters a latent stage.
- Latency lasts years or decades
- Some take longer
- Some early pre-cancerous changes can regress
- High-grade squamous intraepithelial lesions (HSIL) regress in 62% of women with oncogenic HPV infection over 12 months, compared to 100% without oncogenic HPV infection
Cancer almost always occurs as the “transformation zone”. This is the area of the cervix, where the epithelium changes from a columnar shaped epithelium (which lines the endocervical canal) to a squamous epithelium, which covers the rest of the visible cervix.
The transofrmation zone moves naturally with age – in older women it tends to be higher up inside the cervical os, and in younger women, lower down and spreading across the cervix.
Therefore there are two type of cervical cancer – Squamous cell carcinoma (majority of cases) and adenocarcinoma.
Squamous cell abnormalities
In increasing order of severity
- Possible low grade squamous intraepithelial lesion
- No specific cquamous cell changes – not enough to meet diagnostic criteria for LSIL
- Low grade squamous epithelial lesions – LSIL
- Equivalent to CIN1 or “HPV effect”
- 78% of these lesions will regress within 1 year and 90% within 2 years
- Possible high grade squamous intraepithelial lesion
- High grade changes are noted, but the changes are not sufficient to warrant a diagnosis of HSIL
- High grade changes, but do not meet criteria for CIN2,3 or SCC
- High grade intra-epithelial lesion – HSIL – this includes CIN2 and CIN3
- These can still regress, but less often than lower grade lesions
- Squamous cell carcinoma
Glandular Tissue Abnormalities
- Atypical endocervical cells of undetermined significance
- Atypical glandular cells
- Possible high grade glandular lesions
- Endocervical adenocarcinoma in situ
- Adenocarcinoma
HPV prevention
- Primary prevention – HPV vaccination programme
- Secondary prevention – Cervical Screening Programme
The HPV vaccination programme
- Started in Australia in 2007
- Gardasil – protection against 4 HOV types – 16,18 (cervical cancer) and 6 and 11 (warts)
- Originally only for girls aged 12-13
- Catch up offered for females up to the age of 26
- By 2015 75% of Australia females aged 15 have received all three doses of the vaccine
- in 2013 programme extended to include boys aged 12-13
- Designed to protect men from oral, and other anogenital cancer, and warts
- Also designed to protect unvaccinated females
- By 2015, 66% of 15 year old males had received all three doses of the vaccine
Impact of the programme
- Reduced prevalence of affected HPV types
- 92% reduction in vaccinated individuals, 77% in population in general
- Reduced prevalence of target HPV types even in unvaccinated women – probably due to herd immunity
- Reduced incidence of genital warts in men and women aged under 30
- 82% reduction
- Also a 61% reduction in the number of women aged 15-27 presenting for management of genital warts to GP practices
- Reduced incidence of high-grade cervical changes in vaccinated women
The previous screening Programme
From 1991 to 2007 in Australia
- Reduced incidence of cervical cancer
- 18 per 100 000 per year women in the 1980s
- 9 per 100 000 per year women in 2012
- Squamous cell carcinoma overwhelmingly responsible for the reduction
- Adenocarcinoma rates have only dropped by about 30%
- Adenocarcinoma responsible for about 25% of cervical cancer now, as opposed to 15% in the 1980s
- Reduction in mortality from cervical cancer
- 4 deaths per 100 000 women in 1991
- 9 deaths per 100 000 women in 2013
Underscreened populations
- Aboriginal and Torres Straight Islander Individuals – approx. only 33.5%
- 2x more likely to get cervical cancer
- 4x more likely to die from cervical cancer
- Still – there has been a reduction in incidence (-60%) and mortality (-90%) in ATSI populations since 1991
- Women with disabilities
- LGBTI – up to 10x less likely to have been screened – possibly related to a belief that only sex with men is a risk factor (which is not true). Screening rate approx. 38%
- Culturally and linguistically diverse backgrounds (CALD) – rate around 25-30% depending on population
- Women in rural or remote locations
- Women with history of sexual trauma
The New Screening Programme
- For patients ages 25-74
- Patients will usually be required to attend within 2years of the their last PAP smear as the programme rolls out
- Women under 25 who HAVE previously been screened, but have had no abnormalities do not need to attend until they are 25
- After that, for low risk results, screening will be every 5 years
- Women who have had the HPV vaccine still need to be screened
The New Test Regimen
- A 5 yearly test – the Cervical Screening Test replaces the 2 yearly Pap Test
- Screening now starts at age 25 and continues until 74
- Women should have their first Cervical Screening Test at the time they are due for their next Pap test – i.e. 2 years since their last Pap test
- Vaccination against HPV does not affect the testing regimen
- Women who have ever been sexually active should undergo testing
- Women who have low risk results can now undergo testing once every 5 years, instead of once every 2 years
- The new testing regimen is more effective and equally as safe as the previous testing regimen
- The new test is accompanied by a national register which will send out reminders to patients from a national database for their next test, and when they have not attended for FU
The Test
- Liquid based cytology for HPV genotyping
- This is more sensitive than Pap testing, and can detect high-grade HPV earlier, before it has progressed to cancer
- The test can detect:
- Oncogenic HPV types 16 and 18
- Other oncogenic HPV types (pooled result)
- If any oncogenic HPV types are detected, then liquid based cytology (LBC) will be performed on the same sample to check for any abnormal cells
Pap test vs HPV test
| Pap | HPV |
| Cytology | Detects HPV DNA of oncogenic subtypes |
| Cervical sample with brush or other appropriate equipment | Cervical sample with brush or other appropriate equipment |
| Smeared onto a microscope slide and fixation applied | Collection device is placed in a liquid suspension |
| Results – whether or not there are any cervical cell abnormalities | Whether or not there is the presence of DNA of oncogenic HPV types. If positive, then liquid based cytology (LBC) is performed on the same sample. LBC result is reported at the same time as HPV result and a single combined result with advice is given |
Randomised control trials have shown that HPV testing is superior to Pap testing in the prevention of invasive cervical cancer. Compared to cytology, HPV testing shows 60-70% greater protection from invasive cervical cancers.
- HPV testing follow-up has improved rates of detection of HSIL or worse compared to cytology alone
- Equal specificity for HSIL or greater
- High negative predictive value (>99%)
- LBC testing following HPV testing reduces the need for colposcopy
- LBC vs traditional cytology – fewer unsatisfactory samples, can be performed on same sample as the HPV test
- Pap tests have a significant false negative rate – which is partially minimised by a more frequent testing regimen
Why the age increase to 25?
- HPV infections more common in young women and frequently transient
- HPV vaccination has reduced the rate of cervical abnormalities in young women
- Cervical abnormalities are more likely to spontaneously resolve in young women. Treating these abnormalities increases the risk of pregnancy complications
- Cervical cancer in young women is rare. Screening in this age group does not impact on incidiecne or mortality of cervical cancer
Increasing the upper age limit
- Predicted to decrease incidence of cervical cancer by 4% and deaths from cervical cancer by 7%
- Increasing life expectancies mean it is now more appropriate
Pathway
- Women with no symptoms of or past history of cervical cancer
- Screening every 5 years
- Start at age 25
- Cease at 70 to 74 if HPV has not been detected
- No HPV detected
- Low risk – repeat in 5 years
- HPV detected (NOT type 16 or 18) but LSIL or less on LBC
- Intermediate risk – repeat test in 12 months
- Repeat test in 12 months – any HPV detected – for LBC and refer for consideration for colposcopy regardless of LBC result
- If initial LBC result is unsatisfactory – repeat LBC only within 6 weeks
- HPV and HSIL or above, OR HPV type 16/18 detected (regardless of LBC result)
- Refer for consideration for colposcopy
- HPV test result unsatisfactory
- Repeat in 6 months
- Self collected sampling will be available for women OVER the age of 30 who have previous not attended screening, or who are more than 2 years overdue
- This is less sensitive than a speculum collected sample, but designed to increase rates of participation in under screened women (something is better than nothing!)
- Women with abnormal vaginal bleeding or unusual discharge – at any age – should be tested regardless of where they are up to in relation to the screening programme
Results
It is recommended that results are interpreted in accordance with the following pathway:

The Smear Test
What is a smear?
- 1 in 10 smears will show dyskaryosis
- The vast majority of these cases will spontaneously resolve
Methods
- Pap smear – older method, in which sample cells are transferred directly to slide for viewing
- Liquid-based cytology – sample cells are placed in liquid solution for transport to the lab, whereby they are extracted for cytologic analysis.
Indications for smear
- Clinical suspicion – E.g. IMB, PMB
- Screening
Indications for swabs
- Suspected infection
- Elective: to test for subclinical infection
- Before insertion of IUD / IUS
The Previous NHS Smear Screening Programme
- NHS screening programme began in 1988
- It is estimated to have reduced cervical cancer incidence by 90%
- Estimated to save 4,500 lives per year
- Now less than 1,00 deaths per year in the UK from cervical cancer
- Offered to all women aged 25 – 65
- Every three years between 25-50
- Every 5 years between 50-65
- Age 65+ – offered to those:
- Who have not been screened since 50
- Who have had recent abnormal smears
- Used to be offered to all women aged 20-65 – but at age 20, the physiological changes seen in puberty may still be apparent, and thus there was a very high percentage of false positives.
- What does it involve?
- A smear test – usually performed at the GP surgery.
- If this is abnormal, then the patient will be referred for colposcopy, at which time, treatment can be performed if necessary.
- Attendance
- Roughly 80% of those eligible attend for smear screening
- Reminders – usually, if one appointment is missed, a second invitiation is sent, then if this is missed, another reminder probably won’t be sent, but whenever the patient attends to GP, it will be flagged that a smear has been missed.
Results
|
Result
|
Comments
|
Action
|
|
Negative
|
————-
|
Inform the patient of the result. Invite any questions. Treat any ongoing infection
|
|
Inadequate sample
|
Usually the result of poor sampling technique, but could just be a difficult case
|
Repeat the sample as soon as possible. If three inadequate samples, the refer for colposcopy
|
|
Borderline
|
|
Borderline changes in endocervical cells
Borderline changes in squamous cells
|
|
Mild dyskaryosis
|
|
Usual practice to refer for colposcopy after one abnormal smear, but acceptable to have two, six months apart before referral.
|
|
Moderate dyskaryosis
|
|
Refer for colposcopy
|
|
Severe dyskaryosis
|
|
Refer for colposcopy
|
Performing the procedure
- Introduction and explanation – introduce yourself, check the right patient (name, DOB, wrist band). Explain the procedure, state you would like to use a chaperone , and gain consent – this may involve a brief explanation of what a positive result might mean for the patient. Explain that you will be taking a smear and/or swabs, and what the swabs are for.
- Ask the patient to get undressed below the wait, and cover up with a sheet provided, whilst you fetch a chaperone
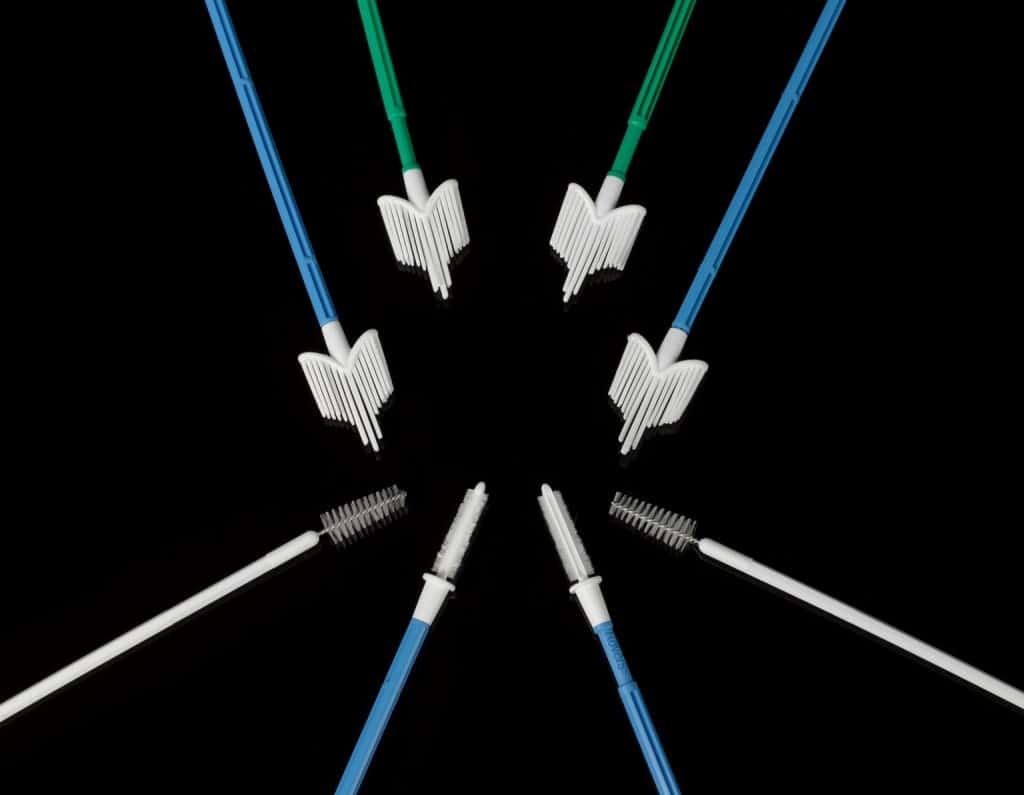
- 2) Collect your equipment. You will need:
- Cousco’s speculum
- Cervical brush
- Transport medium for smear
- Cytology Forms
- Lubricant
- Gloves
- Light source
- Tissues / gauze
- Endocervical swab
- Charcoal swab
- CHAPERONE!
- Wash your hands. Wash out the tray with soap/water (if visibly dirty) or alcohol wipe (if visible clean). Collect the equipment.
- Brief inspection / palpation of abdomen – feel for any pain / tenderness in the pelvic region. Ask if any pain soreness in pelvic region or vagina
- Wash your hands again and put on gloves
- Inspect vulva and vagina – ask the patient to lie back on the bed, bend her knee, and gently allow her legs to fall apart. Look for any signs of discharge, blood or lesions, prolapse. Don’t forget to check the peroneal area.
- Speculum – ask the patient to try to relax, and breathe deeply. Apply some lubricant to the speculum. Ask the patient to take a deep breath in, and insert the speculum, , with the handle at 3 o’clock, as you hold the labia open with your other hand. Once inside the vagina, you can rotate the handle 90’, and slowly open the speculum, to allow viewing of the cervix. Lock the speculum in place.
- Look at the cervix and vaginal walls – and comment on their appearance
- Take a cervical smear – using the smear brush, insert the middle of the brush into the os, then rotate the brush through 360’, five times. Take the brush out of the vagina, and remove the head, placing it into the transport medium.
- Taking swabs – make sure you have explained what the swabs are for. It is not normal practice to perform swabs at the same time as smear. Usually three samples are taken “Triple swabs”
- Endocervical – charcoal – “Stuarts medium” – Gonorrhoea
- High vaginal – charcoal – “Stuarts medium”–HVS high vaginal swab – for TB & BV [anaerobes], group B strep, and candida. swab around the posterior fornix. White Physiological discharge in this area is normal, but if excessive and/or offensive, may indicate infection, particularly in the case of TB, BV and candida. Return the swab to the tube containing the sticky transport medium
- Endocervical –Chlamyia – uses a different type of swab. These come in two sizes with different diameters. Use the larger one, but in nulliparus women, this may not be possible. Put the swab into the endocervix, and rotate through 360’, 3x. This is a test for chlamydia. The smaller of the two swabs can be used to test for chlamydia in the male urethra. When you have taken the sample, put the swab into the liquid for cytology, and break off the end of the stick, to seal it in the tube.
- Remove the speculum – have a look at the vaginal walls as you do so. Then wipe away any lube, and thank and cover the patient, and allow them to get dressed
- Filling in the forms – label your samples (gonorrhoea, general and chlamydia), and fill out the forms.
|
Cervical Smear
|
Stuarts Medium
Used for HVS and Gonorrhoea (endocervical)
|
Chlamydia Swab
|
 |
 |
 |


Bi-manual examination and smear/swabs
- Always perform the smear / swabs / speculum examination first – so you can see any lesions that you might want to palpate
- Offer a full abdominal exam with your bi manual